

Nova-Pro® 300 and 500 8-Step Setup Guide
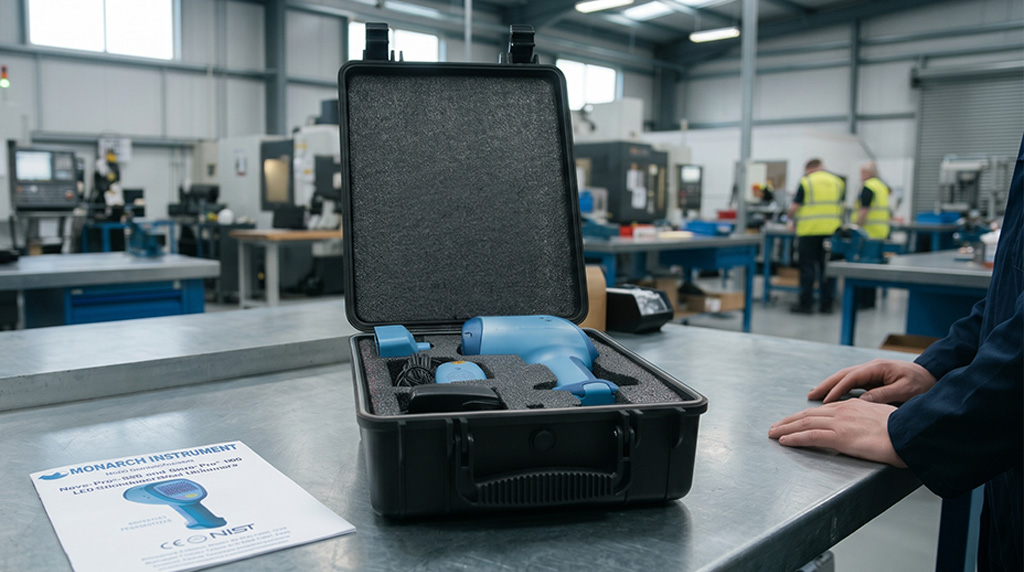
The Nova-Pro® 300 and 500 Stroboscopes/Tachometers measure rotational speed and let your inspect moving parts by synchronizing a flashing light with the motion of the target. With the Laser Module fitted, the Nova-Pro is both an ultra-bright LED strobe and a laser tachometer in one handheld unit, a patented dual-use technology (U.S. Patent 10,080,268.) This guide walks you you through the basic setup process, from powering on the unit to configuring it for use, allowing you to get up and running with minimal effort. Follow these simple steps to ensure your strobe is properly set up and ready for operation.
For complete instructions and product specifications, consult the Instruction Manual.
Table of Contents
Safety First
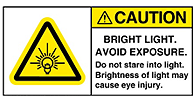
Strobing light can trigger seizures in susceptible people — don’t stare into the LEDs. Machinery that looks stopped may be moving at full speed — keep clear and never touch the target. Laser is Class 2 (<1 mW, 650 nm): never look into the direct or reflected beam (eye-injury risk to 25 ft / 7.5 m), never view it through optics, never aim at aircraft or vehicles. Check your facility’s rules before use in hazardous areas. Clean without alcohol or solvents (which damage the LEDs).
Nova-Pro Interface Icons

Step 1: Power Up
- Peel the tape off the battery terminals. Packs ship mostly discharged, so charge fully before first use.
- Charge the battery pack outside the unit, in the supplied Charging Station only (up to 6 hr.).
- Slide the keyed pack in until the clips lock (optional captive screw). Squeeze the clips to remove.
| Charger LED | Meaning |
|---|---|
| Red | Charging |
| Green | Charged/no battery – remove pack (charger switches to trickle) |
| Flashing Red | Error − replace battery |
AC option: click the AC Power Option into the battery slot, secure the screw, and plug into 100–240 Vac. Indoor use only.
Step 2: Turn On and Operate
| Action | How |
|---|---|
| Power on | Hold POWER until the display lights, then release. The unit recalls the last mode used. |
| Flash/measure | Pull the trigger. Nothing flashes until the trigger is pulled. |
| Power off | Hold POWER until OFF shows. Auto-off after 3 min idle. |
| Lock on (continuous) | Squeeze the trigger → press POWER → keep holding POWER as you release the trigger. The LOCK icon appears. Pull the trigger to unlock. |
| Control | Function |
|---|---|
| POWER | On/Off · Back/escape in menus, trigger lock |
| MENU | Opens keypad, x2/÷2 and Setup menus · confirms selections |
| Joystick | ◀︎▶︎ Choose digit · ▲▼ change value (hold = fast) · scroll menus |
| Touch keypad | Type an exact rate. Capacitive — won’t work with gloves. |
Step 3: Choose a Mode of Operation
MENU (until SEtUP displays) → ▲▼to MODE → MENU → ▲▼pick → MENU.
| Mode | What fires the flash | Use it to… | Needs |
|---|---|---|---|
| STROBE | Internal rate you set — or an external sensor if one is plugged into the input jack (EXT icon; rate then can’t be adjusted) | Freeze motion and inspect a part at a speed you dial in | Nothing extra |
| LASER | Laser reflection off a reflective mark on the target (laser icon blinks = armed, solid = on) | Lock the flash to the machine so the image stays frozen even if speed drifts | Laser Module + reflective target |
| TACH | Does not flash — reads speed only (TACH icon) | Measure RPM/RPS without contact | Laser Module or external sensor |
Note: LASER modes appear only with the Laser Module fitted.
Step 4: Freeze Motion (Strobe)
Set the Flash Rate (Pick Any Method)
- Joystick: press to blink a digit → ◀︎► move digit → ▲▼ change. Edit cancels after 5 s idle.
- Keypad: press MENU once → type the rate → press (enter).
- Double/halve: press MENU twice → tap x2 or ÷2 (or use joystick). POWER exits. If the result would exceed the range (30-999,999 RPM), the rate stays put.
Confirm the TRUE Speed
- Adjust until you see a single stopped image.
- Press x2 until the image doubles (two or more copies).
- Press ÷2 until it is a single image again — that reading is the real speed.
Step 5: Measure or Lock On With the Laser
Use the Laser: Configure the Mode of Operation
- Apply a reflective mark to the shaft or part.
- Select LASER (flash synced) or TACH (speed reading only).
- Pull the trigger and aim the beam at the mark. The On-Target icon shows when the mark is detected.
- Read the speed in your chosen units on the display.
External Sensors and Input/Output Jacks (Side of Unit):
- Input (3.5 mm stereo): powers a sensor (5 Vdc @ 75 mA), accepts 3–12 V signals. Optical, laser, IR and magnetic sensors available (e.g., ROS-P, RLS-P, IRS-P, MT-190P).
- Output (3.5 mm mono): TTL sync pulse to daisy-chain other strobes or data systems; runs at the internal rate even when the
trigger isn’t pulled. - Set trigger edge (POS/nEG) in MISC → INPUT/OUTP.
Step 6: Setup Menu Map
- Navigate: MENU until SEtUP shows ▲▼scroll → MENU enter/select → POWER back. On-Target icon marks the current choice.
- To save a value: press MENU, then POWER. Items shown depend on mode and Laser Module.
| Menu | Options | Notes |
|---|---|---|
| MODE | STROBE • LASER • TACH | Selecting changes mode and exits the menu |
| BRITE | Degrees 0.1°–14° (proportional) or Time 0.001–2.000 ms (fixed). MENU again skips DEG to reach Time. | Live — effect visible with trigger pulled. Last one adjusted is used. |
| MISC | DECPT none/1/2/3 · UNITS RPM, RPS (Hz), FPM, FPS · INPUT/OUTP edge POS or nEG · BKLIT on/off | FPM/FPS not available in TACH |
| MEMRY | 10 slots; ► toggles SM (save) / RM (recall) → ▲▼pick slot 1–10 → MENU + POWER | Stores flash rate, brightness & JOG only |
| JOG (500 only) | NONE • PHASE (−360° to +345°) · TIME (±50 ms) | STROBE mode, no external input |
| DELAY (500 only) | NONE • PHASE • TIME • VRPM (−60 to +60 RPM) | LASER mode or STROBE with external input |
Step 7: Get a Sharp, Bright Image
Longer flashes look brighter but blurrier; shorter flashes are sharper but dimmer.
- Sweet spot to stop motion: 1.8°–3.6° (Degrees setting).
- Degrees keeps blur constant as speed changes — which is best for most work.
- Time (ms) is fixed, so the image gets brighter and blurrier as the rate rises.
- Unit caps every flash at 2.0 ms/14°, whichever is reached first.
- Points farther from the shaft center blur more.
Step 8: Slow Motion and Phase (500 unit only)
| Tool | What it does |
|---|---|
| JOG (internal) | Freeze the image first, then tap the ◀︎▶︎ touch icons to rotate the view by your PHASE/TIME step — e.g., bring a keyway into sight. Kept through power-off; select NONE to clear. |
| DELAY · PHASE | Delays flash from the laser/sensor trigger by degrees. Tracks speed, so the view stays put. |
| DELAY · TIME | Fixed millisecond delay, constant regardless of speed. |
| DELAY · VRPM | Auto slow motion: the image appears to turn at the set virtual RPM (AUTO icon) so you can watch a full cycle. |
Quick Troubleshooting
| If… | Try this… |
|---|---|
| Keypad ignores taps | Remove gloves (capacitive keypad) |
| Can’t change the rate | An external sensor is plugged in (EXT icon) and the input sets the rate. Unplug it, or switch modes |
| No flash | Pull the trigger; check you’re not in TACH mode |
| Laser won’t lock on | Use a reflective mark; aim until On-Target shows. LASER/TACH need the Laser Module |
| Two or more images | Rate is a multiple of true speed — use ÷2 (Step 4) |
| x2/÷2 does nothing | Result would be outside 30–999,999 (RPM) range |
| Image dim/dark | Raise BRITE setting; stay within 1.8°–3.6° for best sharpness |
| Unit keeps turning off | 3-minute auto-off — use trigger lock for continuous runs; also check battery/TEMP |
| Odd phase offset at start-up | A JOG setting persisted — set JOG to NONE |


