
How To: Installing Track-It™ Software and Drivers
When downloading or installing Track-It™ Software for Dataloggers and the associated USB Drivers, most (if not all) issues that arise are Windows® related, company security policy, or computer hardware setup. Let’s tackle these situations!

Make sure you have the latest version of Track-It DataLogger Software! Older versions cannot be installed on Windows 10 or 11
Downloading Track-It Software Files
Monarch Instrument’s Track-It DataLogger Software (and associated USB Drivers) is free to download from our website for use on as many computers as desired. (Note that it will typically download to the Downloads folder as a ZIP file which will need to be unzipped. Download is available on all Track-It product pages except RFID – see tabs.)
Windows Defender or other antivirus programs may block the software download because it has executable files. See Track-It DataLogger Software tab on product pages for instructions.
To begin:
Temporarily turn off Windows Defender (or other antivirus software) before downloading Track-It DataLogger Software.
Managing Windows® Security Measures
There are a few things to understand when downloading and installing Track-It Data Logger USB Drivers and Track-It Software on PCs with Windows 7, 10, and 11.
To provide “security and privacy measures”, Windows 10 and 11 restrict users in what they can install (software and drivers) and where they can install them.
Here’s how to proceed:
Track-It Software is a 32-bit application. Installing a 32-bit application on a computer with a 64-bit Windows operating system automatically sends the installation files to Program Files (x86). So, confirm the sharing and control settings in this subfolder.
How to check sharing and control over the Program Files (x86) folder:
- From File Explorer, select This PC or Computer.
- Open the Local Disk (C:) drive.
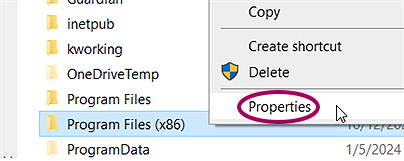
- Select the Program Files (x86) folder, right-click, and select Properties.
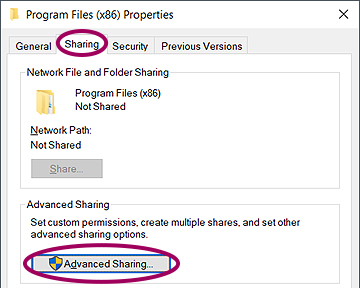
In the Program files (x86) Properties folder, select the Sharing tab and click Advanced Sharing…
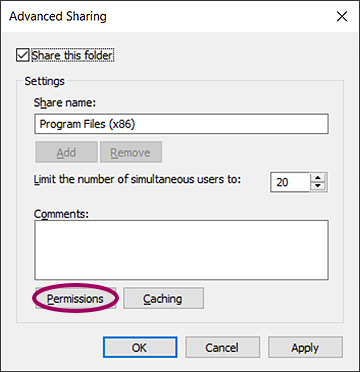
On the Advanced Sharing screen, be sure that Share this folder box is checked.
Then click the Permissions button.
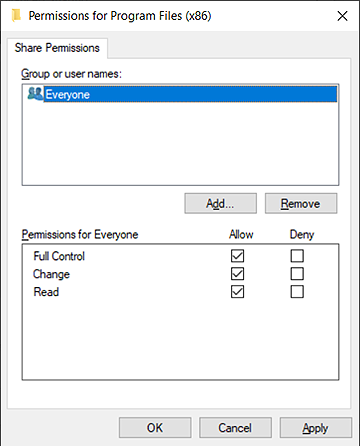
Choose desired Group or user names.
Select Permissions for Everyone as desired.
Click OK.
Click OK again and then Close to close the Program Files (x86) Properties screen.
COM Port Verification

Before installing the necessary USB Drivers for Track-It Software, confirm that your Windows® PC has Communications Ports activated.
Monarch Instrument’s USB devices use virtual COM port drivers. This means that once the USB Drivers have been installed and the data logger is plugged in, the data logger will appear as a Communications Port titled USB Serial Port (COMx) (where x is the number assigned by the PC) listed under Ports (COM & LPT) in the Device Manager.
To demonstrate, the image to the right shows a data logger plugged in that was assigned COM3 (although it can be any number that your computer assigns to it.)

To verify Communications Ports are activated, open Device Manager and see if Ports (COM & LPT) is listed. (Note that installed devices are in alphabetical order.
If Ports (COM & LPT) is listed, then it is OK to proceed to the installation of the Track-It Drivers and Software.
If it is NOT listed, then Ports must be manually added. See below for instructions on how to manually install Ports. Most users are able to do the installation, but in some very security-conscious companies, an IT representative may have to do these steps.

Manual Installation of Ports
To install the necessary Ports, complete the following steps:
Important note before installing:
DO NOT have a data logger plugged into a USB port during installation of ports or drivers.
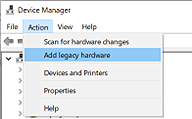
Open Device Manager and click on Add legacy hardware from the Action menu.
Note: You must click on any item in the list for the complete list of actions to be displayed under the Action menu.
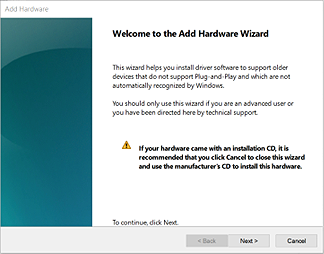
The Add Hardware Wizard will open.
Click Next.
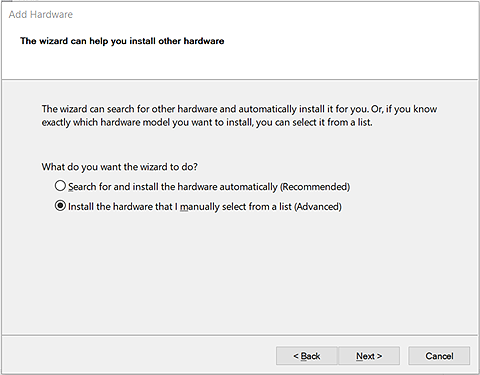
On the next Add Hardware screen, select Install the hardware that I manually select from a list (Advanced).
Click Next.
On the next screen (right), scroll down the list of Common hardware types and select Ports (COM & LPT).
Click Next.

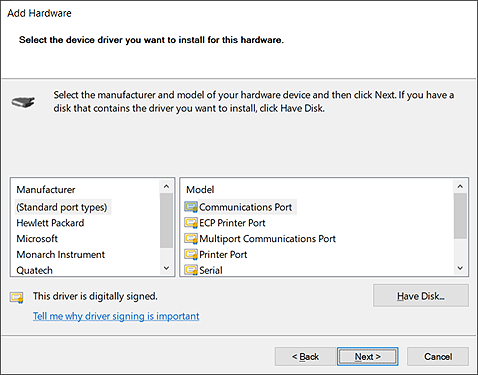
One the next screen (right), under Manufacturer, select (Standard port types). Under Model, select Communications Port.
NOTE: It is essential that Standard port types and Communications Port are listed and can be selected as shown above. If not, then the PC may not have the hardware necessary to support Monarch Instrument Data Loggers. This is very rare, but some Windows PCs do not have the full Microsoft feature set. In the event this happens, contact Monarch Instrument.
Click Next.
Click Next again to install the Communications Port.
Once complete, click Finish to close the Add Hardware Wizard.

Installing Track-It Data Logger USB Drivers and Software
Important note before installing: DO NOT have a data logger plugged into a USB port during installation of ports or drivers.
Due to Window’s stringent safety protocols, it is required that the Track-It user be an administrator with full access. Note that in companies or organizations with strict IT protocols, IT specialists may have to do this installation.
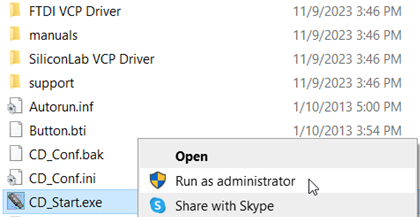
The Track-It installation files will be downloaded to a compressed ZIP file, which will need to be upzipped/extracted. The unzipped file folder contains multiple subfolders and files.
Double-click on the Track-It_Software folder and then right click on CD_Start.exe and select Run as administrator.
This will open the Track-It Software Installation menu (right).
Once the USB Drivers are installed, click on Install Software and follow the instructions to complete the installation.
Click on Install USB Driver and follow the prompts. Accept any security measures and the License Agreement to continue installation.
For more detailed instructions on installation, click on Software Manual (which will open the Track-It DataLogger Software Manual) and read through section 1.0.

If “Create shortcuts on Desktop” is selected during installation, you will see these two icons on your Desktop (right).

You are now ready to plug in your data logger into a USB port on your computer, open Track-It DataLogger Software, and set up your logger to record data!
Download a quick overview: https://www.monarchserver.com/Files/pdf/Quick_Start_Guide.pdf.
Download Datalogging Made Easy, go to: https://monarchserver.com/Files/KB/DataLoggingMadeEasy.pdf
Contact Monarch Instrument’s Technical Support if you have any questions. By calling 800-999-3390 or by filling out our contact form here on the website. We’re here to help.